
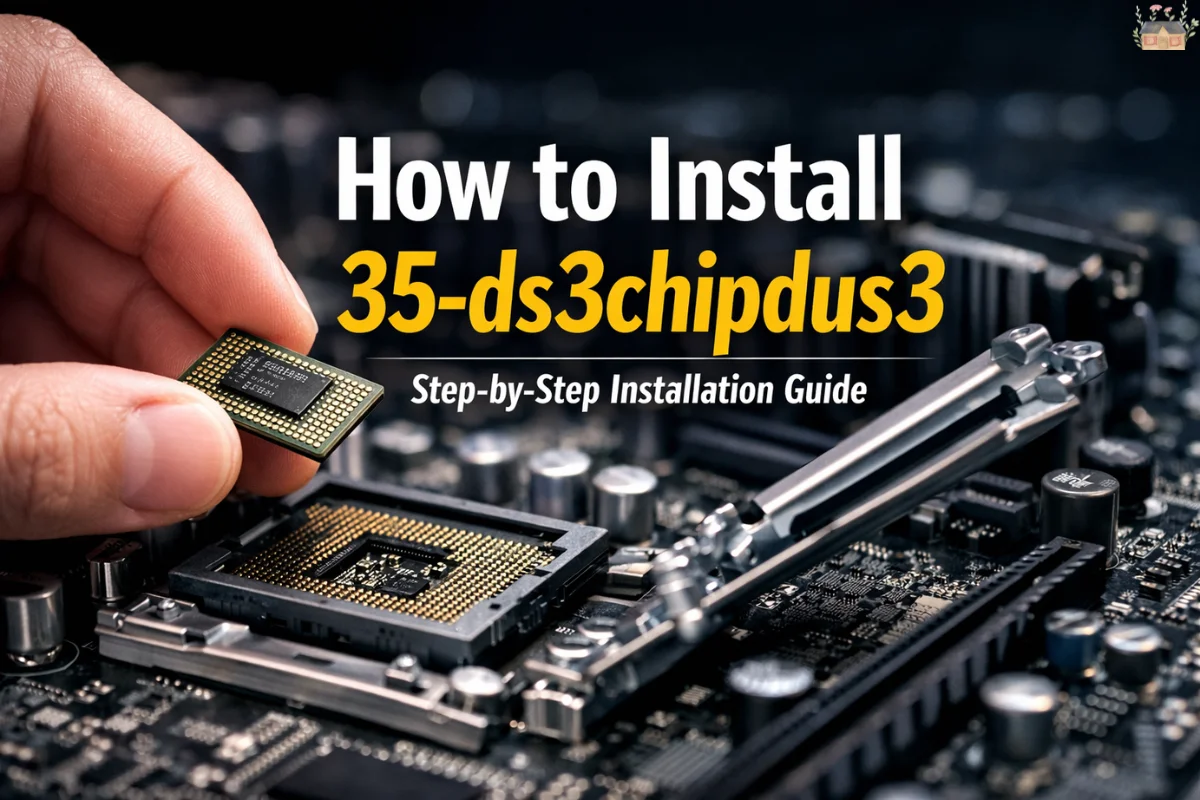
Upgrading internal hardware can feel intimidating, especially if you’ve never opened a device before. If you’re searching for how to install 35-ds3chipdus3, you’re likely looking for a reliable way to improve speed, stability, and efficiency without replacing your entire system. That’s exactly what this guide delivers.
Unlike short tutorials that gloss over important details, this article walks you through the entire process—from understanding what the chip does to verifying compatibility, installing it safely, optimizing performance, and maintaining long-term stability. Whether you’re a beginner or an experienced user, you’ll find practical, trustworthy guidance here.
Table of Contents
ToggleWhat Is the 35-ds3chipdus3 Chip?
The 35-ds3chipdus3 is a compact, high-efficiency performance chip designed to enhance processing speed, multitasking stability, and power management. It’s commonly used as an upgrade in compatible desktops, workstations, gaming systems, and specialized computing devices.
Instead of replacing major components like the CPU or motherboard, this chip focuses on targeted performance gains. It allows systems to handle newer software demands while reducing heat output and energy consumption.
Key Technical Characteristics
| Attribute | Description |
|---|---|
| Architecture | Performance-optimized, energy-efficient |
| Form Factor | Compact, low-profile |
| Heat Output | Reduced thermal load |
| Power Usage | Lower than legacy chips |
| Typical Use | Extending system lifespan |
Why Learn How to Install 35-ds3chipdus3?
Knowing how to install 35-ds3chipdus3 gives you direct control over your device’s performance and longevity. Many users choose this upgrade when their system feels slow but still functions reliably.
Benefits of Installing the 35-ds3chipdus3
-
Faster boot and application load times
-
Smoother multitasking under heavy workloads
-
Better compatibility with modern software
-
Lower operating temperatures and fan noise
-
Improved power efficiency over time
Before vs After Performance Snapshot
| Area | Before Upgrade | After Upgrade |
|---|---|---|
| Responsiveness | Inconsistent | Smooth |
| Multitasking | Limited | Stable |
| Heat Levels | Higher | Lower |
| Energy Efficiency | Moderate | High |
Is Installing the 35-ds3chipdus3 Safe?
Yes—when proper precautions are followed. Installing this chip is considered a low-risk hardware upgrade, similar to installing RAM or a storage module.
Why the Installation Is Low Risk
-
No soldering required
-
Standardized slot design
-
Minimal tools needed
-
Built-in hardware safeguards
Most problems occur when preparation steps are skipped, not because of the chip itself.
Compatibility Checklist Before Installing 35-ds3chipdus3
Before proceeding with how to install 35-ds3chipdus3, confirm that your device supports it.
Basic Compatibility Requirements
-
✔ Supported slot type for the chip
-
✔ Firmware or BIOS allows expansion
-
✔ Physical clearance inside the case
-
✔ Adequate power delivery
-
✔ Manufacturer permits user-installed upgrades
Skipping this step is the most common reason for installation failure.
Advanced Compatibility Factors to Check
Beyond basic requirements, experienced installers also verify deeper compatibility details.
Firmware and Microcode Support
Some systems require a firmware or BIOS update to recognize newer chips. Without this, the chip may not be detected or may perform poorly.
Power Regulation Health
While the 35-ds3chipdus3 is energy efficient, aging power components can struggle under sustained load. Systems that already show power instability should be inspected first.
Thermal Design Margin
Compact systems benefit greatly from this chip, but airflow still matters. Clean fans and unobstructed vents improve long-term stability.
Devices Commonly Compatible With the 35-ds3chipdus3
This chip is widely used in:
-
Desktop PCs and workstations
-
Certain gaming consoles
-
Modular industrial systems
-
Upgrade-friendly laptops
Laptop users should confirm internal access, as not all models allow chip upgrades.
When You Should Not Install the 35-ds3chipdus3
Understanding how to install 35-ds3chipdus3 also means knowing when it isn’t the right solution.
Avoid installation if:
-
The motherboard is physically damaged
-
Components are fully soldered
-
Firmware updates are no longer supported
-
The system already overheats at idle
-
Power delivery issues exist
In these cases, repair or replacement may be a better investment.
Tools Needed to Install 35-ds3chipdus3 Correctly
Preparation makes installation smoother and safer.
Essential Tools
-
Phillips screwdriver
-
Anti-static wrist strap (recommended)
-
Small container for screws
-
Clean, flat, well-lit workspace
-
Internet access for drivers
Optional but Helpful Tools
-
Compressed air for dust removal
-
Temperature monitoring software
-
Benchmarking tools
Preparing Your System Before Installing 35-ds3chipdus3
Proper preparation protects both your data and hardware.
Step 1: Back Up Important Files
The installation won’t erase data, but backups protect against unexpected issues.
Step 2: Fully Power Down
Shut down the system, unplug all cables, and remove batteries if applicable.
Step 3: Prevent Static Discharge
Use an anti-static strap or ground yourself on an unpainted metal surface.
Step 4: Inspect and Clean Internals
Dust buildup should be removed before installing new components.
How to Install 35-ds3chipdus3 Step by Step
This section explains how to install 35-ds3chipdus3 safely, even if you’re new to hardware upgrades.
Step 1: Open the Device Case
Remove the access panel or housing screws and store them safely.
Step 2: Locate the Correct Chip Slot
Use the device manual to identify the designated slot, usually near the processor or memory.
Step 3: Remove an Existing Chip (If Present)
Release the locking mechanism and lift the chip straight out without force.
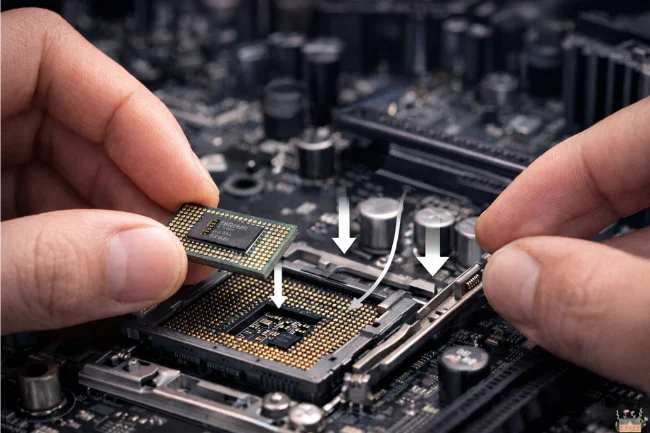
Step 4: Align the 35-ds3chipdus3
Check orientation markers such as notches or arrows. Never force the chip into place.
Step 5: Insert and Secure the Chip
Press evenly until fully seated, then secure using clips or screws if required.
Step 6: Reassemble the Device
Replace the case panel and reconnect all cables.
Step 7: Power On and Initial Verification
Start the system and observe the boot process. A normal startup indicates success.
Driver and Software Setup After Installing 35-ds3chipdus3
Driver installation is a crucial part of learning how to install 35-ds3chipdus3 properly.
Best Practices for Drivers
-
Download drivers directly from the manufacturer
-
Avoid third-party driver tools
-
Restart the system after installation
-
Apply firmware updates if recommended
Drivers ensure the operating system fully utilizes the chip.
Read More: TechExample Org
Testing and Validating Performance After Installation
Verification confirms the upgrade delivered real benefits.
What to Check
-
Chip detected by the system
-
Faster boot and load times
-
Improved multitasking
-
Stable operating temperatures
Useful Testing Tools
| Purpose | Tool |
|---|---|
| Performance | Geekbench, CPU-Z |
| Temperature | HWMonitor |
| Stability | Stress-test utilities |
Common Problems When Installing 35-ds3chipdus3 (And Fixes)
Even when following how to install 35-ds3chipdus3, issues can occur.
| Issue | Likely Cause | Solution |
|---|---|---|
| System won’t boot | Chip not seated | Reseat the chip |
| Chip not detected | Missing driver | Install or update drivers |
| Overheating | Poor airflow | Clean fans, improve ventilation |
| Random freezes | Firmware conflict | Update BIOS/firmware |
Optimizing Performance After You Install 35-ds3chipdus3
Installation is just the first step.
Optimization Tips
-
Enable performance or efficiency modes
-
Keep drivers updated monthly
-
Monitor temperatures during heavy use
-
Maintain clear airflow inside the case
These steps ensure consistent long-term performance.
Long-Term Maintenance for the 35-ds3chipdus3
Routine maintenance keeps your upgrade effective.
Recommended Maintenance Schedule
| Task | Frequency |
|---|---|
| Driver updates | Monthly |
| Internal cleaning | Every 2–3 months |
| Performance benchmarking | Quarterly |
| Temperature monitoring | Ongoing |
How to Uninstall or Replace the 35-ds3chipdus3
Knowing how to install 35-ds3chipdus3 also means knowing how to remove it safely.
Safe Removal Steps
-
Power down and unplug the system
-
Discharge static electricity
-
Open the case
-
Release locking mechanisms
-
Lift the chip straight out
-
Store it in an anti-static bag
Removal is usually quicker and lower risk than installation.
Real-World Use Cases and Benefits
Users who install this chip commonly report:
-
Faster productivity workflows
-
Smoother gaming and rendering
-
Reduced fan noise
-
Lower energy consumption
-
Extended system lifespan
For professionals and home users alike, the benefits are immediately noticeable.
FAQs About How to Install 35-ds3chipdus3
Can beginners install the 35-ds3chipdus3?
Yes. With careful preparation and step-by-step guidance, beginners can install it safely.
Will installing this chip void my warranty?
This depends on the manufacturer. Always review warranty terms first.
How long does installation take?
Most users complete the process in 30–45 minutes, including driver setup.
Can the chip be reused in another system?
Yes, if the new system supports the same slot and specifications.
Is it worth installing on older systems?
If compatible, the performance improvement can be significant and cost-effective.
Final Verdict: Should You Install the 35-ds3chipdus3?
If you want a practical, affordable way to improve system performance, learning how to install 35-ds3chipdus3 is a smart investment. The process is manageable, the risks are low when done correctly, and the gains in speed, efficiency, and stability are real.
With the right preparation, careful installation, and basic maintenance, this single upgrade can dramatically improve how your system performs—without the cost of a full replacement.
Learn about Is QY-45Y3-Q8W32 Good?
For broader information, visit Wellbeing Makeover

Alex Carter is a writer with 10+ years of experience across tech, business, travel, health, and lifestyle. With a keen eye for trends, Alex offers expert insights into emerging technologies, business strategies, wellness, and fashion. His diverse expertise helps readers navigate modern life with practical advice and fresh perspectives.